This Blog is the continuation of the Back to Back Buy Flow.
As a Buyer, I have the same intuitive Home page with quick access to the tasks that I perform.
[Click: Procurement]

Click: Purchasing

I have easy access to Requisitions and Purchase Order.Searching is made simple.
[Click: Search Drop Down]
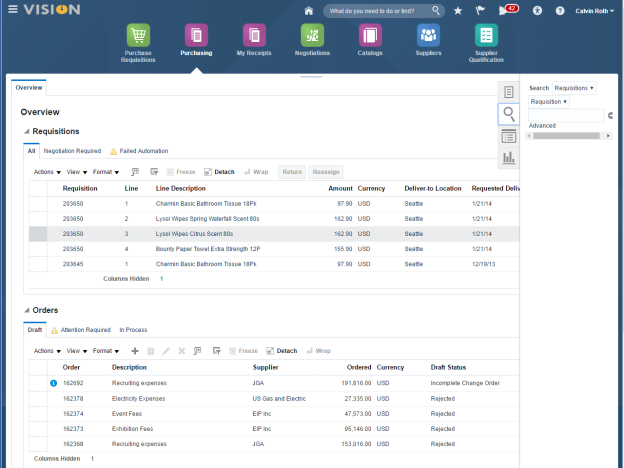
Select: Orders

Since I know the order number that I am searching, I can enter it directly.
[Enter: Purchase Order Number for the Configured Product Supply Order.]

[Click: Collapse General]

The item ordered in this case is a configuration and viewing these details can be done in just a click.
[Click: View Configuration]
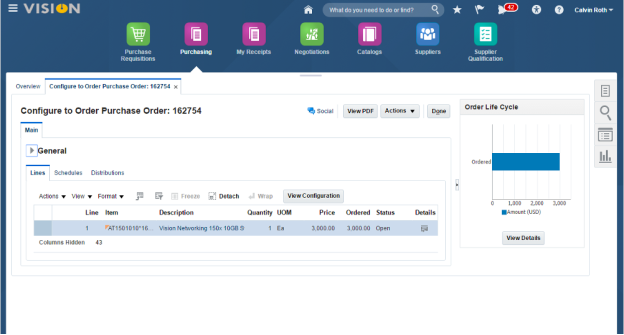
The complete configuration is passed from the Sales Order to the Purchase Order for the Supplier.The Uplink Module has an additional purchase cost of $300.This option added $400 to the sales price, so we are in line with our planned margins.
[Sign on as the Warehouse Operator, Peter Wilson]

End to End Order to Cash
- Automated Order Fulfillment
- Easy Picking and Shipping
The purchase is sent electronically to the supplier for fulfillment.Changing roles to the warehouse operator, I will create the receipt for the products shipped from the supplier into the warehouse.
Following the receipt, I can ship the products to the customer.
[Sign In User: peter.wilson/weekly password]
I’m Peter Wilson, a Warehouse Operator in the Chicago Distribution Center.In the warehouse, we need to get products in and out of inventory with a system that is easy to use, eliminates errors and ensures accurate inventory.One of my tasks is to receive goods when they are delivered.The springboard makes it easy for me to access the system to perform all of my routine tasks.
[Click: Receipts]

My expected receipts are displayed. This makes it easy for me to enter receipts without searching.
[Click: Expected Shipment Lines for Midtown Computer Supplies]
%The number of receipts may vary, depending on others using the same environments and other demo flows that you might have staged.

Receipt of goods is done in just a couple of clicks.
[Click: Row/s for the Purchase Orders pegged to your Sales Order]

Receiving multiple items in a single transaction streamlines the process.
[Click: Receive]

The item information is defaulted.Only a couple of fields are required.
[Enter: Quantity from the Sales Order]
%You may also choose to Click: Show Receipt Quantity.

[Click: Subinventory

I identify the put away location.
[Select: Subinventory, Stores]

I repeat for the second item.
[Enter: Quantity]

[Select: Subinventory, Stores]
I’m ready to create the receipt.
[Click: Create Receipt]

Flexible options allow me to record any specific receipt information.
[Click: Submit]

Receipt confirmation is given and I am done!
[Click: OK]

Another task I perform in the warehouse is shipments.
[Click: Home]

The Next Blog will cover the Picking and Shipping steps of the Back to Back Process.